Array
Working With Array & Bevel Profile
1. Go to Create panel > Standard Primitive > Plane, set the Lenght for example = 3.5 cm and width= 12 cm also set Lenght segments = 1 and width Segments =2
2. Select Object and then Right Click > Convert To Editable Poly
3.Go to Modify Panel > Editable Poly > Polygon Selection > Select left polygon > delete
4. Select object > Modifier list > "Symmetry" > select "X" for the mirror axis
5. Deactivate Symmetry modifier > add line in between > Extrude Edge ( Click some edges + press "Shift" on your Keyboard + drag/Move )
6. Continue Step 5 above, Extrude some Edges, and Remove unnecessary vertex.
7. Symmetry Modifier Activated
8. Add new lines with "Cut" or "Connect"see the tutorial about cut and connect Here
9. Go to Modify Panel > Editable Poly > Edge Selection >Select some Edges > Pull
10. Go to Modify Panel > Editable Poly > Edge Selection > Extrude Edges ( Click some edges + press "Shift" on your Keyboard + Move )
11. Add new detail lines with "Cut" or "Connect" > push back those lines a little bit.
12. Go to Modify Panel > Editable Poly > Subdivision Surface > activate "Use Nurms Subdivision" set the iterations = 2 or more to get the smooth result. also you can do with "Mesh smooth, Turbo Smooth, or Open Subdiv Modifier"
13.Go to Create Panel > Standard Primitive > create Cylinder > set the radius for example = 68 cm heigh= 1cm, height segments = 1, cap segments 2 and sides = 22 ( it's additional object that we need to align the carving pivot )
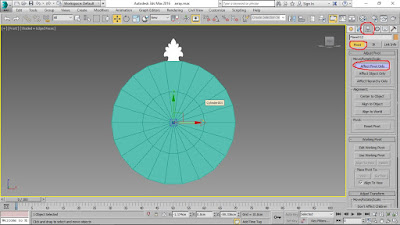
14. Select the object (place the object in the center of cylinder,use snap tool see the picture below) > Go to Hierarchy panel > Pivot > Affect Pivot Only > align the carving pivot to the center of cylinder use the 2.5 snap.
15. Select the Carving > Menu bar > Tools > Array
16. Set the array parameter > Activate Rotate > 360 degree > Type of object "Instant" > Count = 22, and press "Preview" then press OK.
17. Congratulation...! your object copied perfectly
18. Go to Create Panel > Splines > Circle > set the radius for example 68 cm
19. Go to Front View > Create Panel > Splines > Line > Create the Profile ( see the proportion )
20. See the detail here, it's just an example, you can play with your own idea.
21. Select the "Circle" object > Go to Modifier List > Bevel Profile > Pick profile > select the profile that you created before. the profile shape will follow the circle.
22. Select the Circle > activate 2.5 snap > drag/move to the center of Cylynder.
23. Delete the Cylinder
23.Select Circle object > Add Turbosmooth ( in this case you can use mesh smooth or, Open Subdiv modifier )
24. Add FFD 3x3x3 modifier , select some control points > pull backward ( if you do in 1 carving object, it's will be automatically applied for the others object because we have set the array object as instance )
25. Finally your model is done!
Subscribe to:
Post Comments (Atom)


thanks gan tutorialnya..
ReplyDeletesalam kenal ane juga drafter 3d buat cnc milling...
ane pake Rhinocheros agan ada tutorialnya ga buat bikin carving..??
Mohon maaf saya bukan pengguna Rhino, jadi belum bisa bikin tutorialnya.
DeleteTeşekkürler
ReplyDelete
Deletebir şey değil
Teşekkürler
ReplyDeleteyou are welcome
Deleteguuuutt..
ReplyDeletethanks
Deletenice
ReplyDelete